Managing Resources using Terraform
#TerraWeek Challenge by TWS Community Builders
DevOps || Git || Terraform || Cloud | Linux | Shell Scripting | Splunk | Kubernetes | Docker || Jenkins
Introduction:
Many organisations use Infrastructure as Code (IaC) as one of their essential practices to implement DevOps processes the right way. IaC is an approach for defining, provisioning and managing the required infrastructure in code format. This helps you to cut the manual effort and the time needed for bringing up the infrastructure.
In Terraform, resources are the most important part. Resources are defined by resource blocks. A resource can define one or more infrastructure resource objects, such as VPCs, virtual machines, DNS records, Consul key-value pair data, etc.
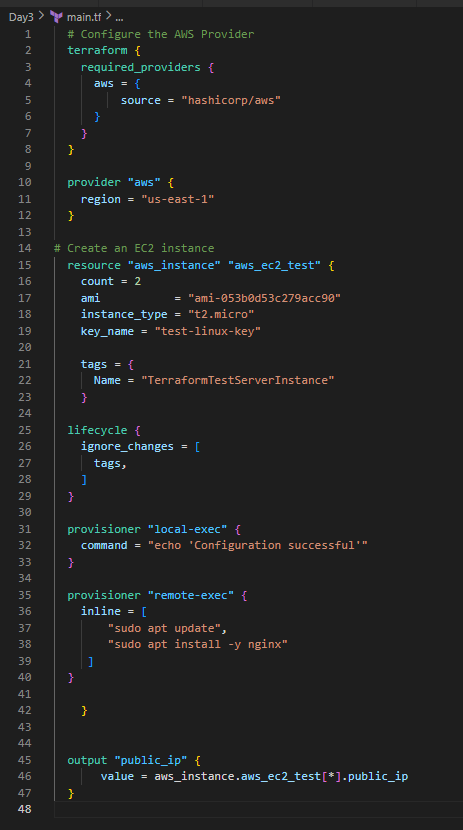
1.Create a Terraform configuration file to define a resource of AWS EC2 instance.
Before creating any instance, the most important thing is AWS configuration. I have mentioned in my first Terraform blog, how you can securely set up AWS with Terraform instead of mentioning the secret key in the code. I recommend reading that blog before writing your configuration file.
Firstly, we want to create an AWS EC2 instance. You need to start by creating a file with .tf extension. I have created a file called main.tf. Below is the screenshot of that file.
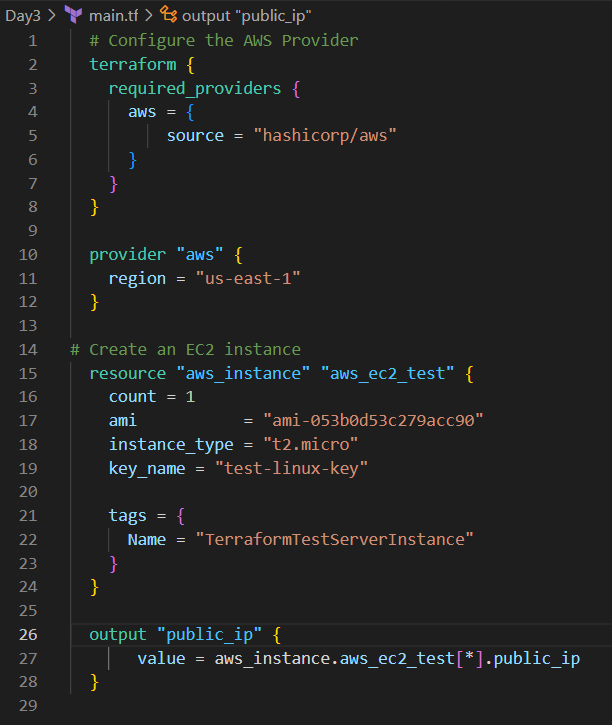
Now, we need to configure the provider. In this case, it is AWS. So, you have to configure the AWS provider in your Terraform configuration file. I have chosen the region "us-east-1".
Once you are done with the provider block, we need to think about the resources. We have to use resource blocks to define the specific resources(EC2) you want to create and manage. I have mentioned below things in the file:
count: It notifies how many instances you want to create. I have mentioned 1.
ami : The Amazon Machine Image (AMI) ID to use for the instance. You can get that from an AWS account.
instance_type: Here you have to mention the type of instance you want to use. I have chosen t2.micro instance.
key_name: The name of the key pair you want to use to SSH into your instance.
tag: This will allow you to add metadata to the resource, here I have chosen the name "TerraformTestServerInstance".
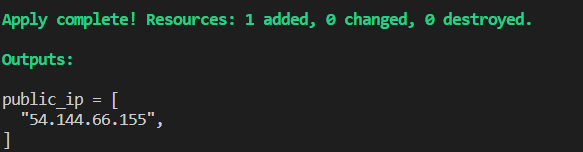
In the end, I want the output of the public IP of the instance for verification purposes.
2.State File:
Whenever Terraform creates a new infrastructure object by using "terraform apply", it creates a state file. Inside the state file, it records the state of the infrastructure so that Terraform can update or destroy it in the future according to the change plan.
If the resource described by a resource block is already recorded in the state file, then Terraform will compare the state of the record with the state described by the code, and if necessary, Terraform will make a change plan to make the state of the resource match the description of the code.
Note: It is important to never modify the state file directly. Instead, make use of terraform state command.
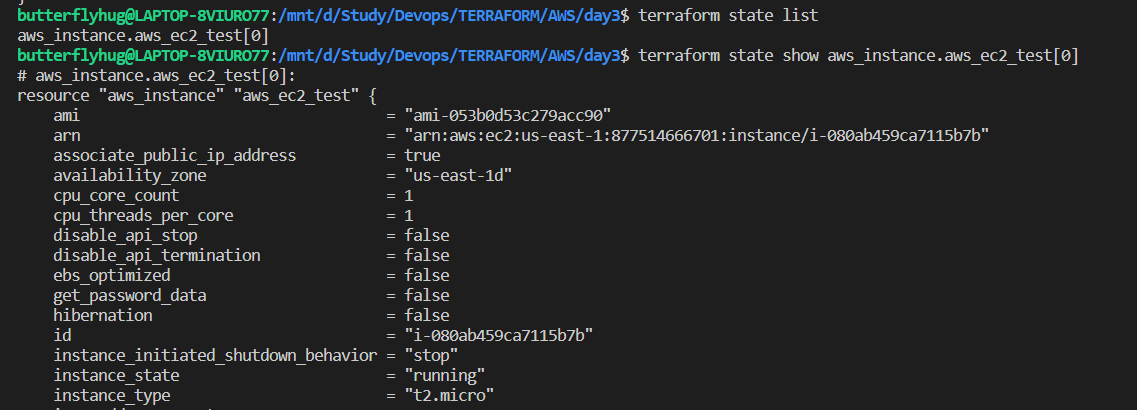
Multiple sub-commands can be used with terraform state. I have shown two examples in the above image.
terraform state list: It will list resources within terraform state file.
terraform state show: Show the attributes of a single resource in the state.
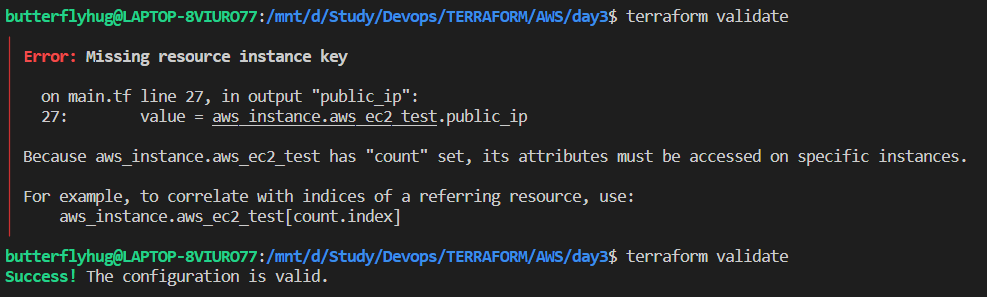
3.Validation:
The terraform validate command validates the configuration files in a directory. "Validate" execution verifies whether a configuration is syntactically valid and thus it is useful for a general check of the correctness of attribute names and value types. It is safe to run this command automatically, for example, as a post-save check in a text editor or as a test step for a reusable module in a CI system. It can run before "terraform plan" command.
Validation requires an initialized working directory with any referenced plugins and modules installed.
Below is an example of validation of an invalid file and a valid file.
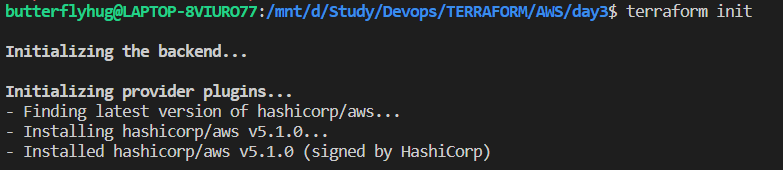
Once you are done with the code and validation, you can run the following Terraform commands to execute the code.
terraform init ->terraform plan ->terraform apply
Terraform init will initialize the providers and set up the backend configuration.
Terraform plan command helps you to see the execution plan and what resources will be created and how they will be configured.

Then we have to enter Terraform apply command. The actual execution will happen through this command execution.

Once execution is completed successfully, we can see the expected output:
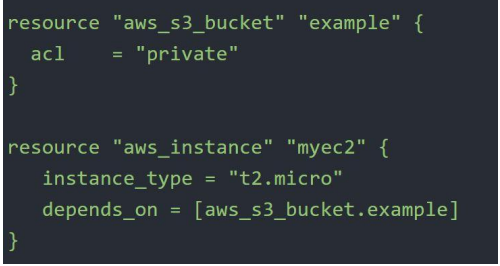
4.Resource Dependencies:
The “depends_on” meta argument in Terraform is used to specify dependencies between resources within a Terraform configuration.
There are two types of resource dependencies.
i)Dependency Types - Implicit:
With implicit dependency, Terraform can automatically find references of the object and create an implicit ordering requirement between the two resources.

ii)Dependency Types - Explicit:
Explicitly specifying a dependency is only necessary when a resource relies on some other resource's behavior but doesn't access any of that resource's data in its arguments.
5. Terraform Provisioners:
Provisioners can be used to model specific actions on the local machine or on a remote machine to prepare servers or other infrastructure objects for service. Provisioners are defined inside the resource block. We can execute scripts or other actions via the provisioner.
Example:
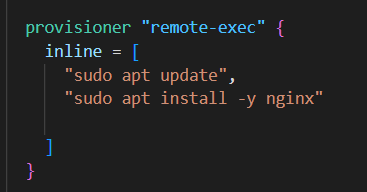
Here, the remote-exec provisioner invokes a script on a remote resource after it is created. The remote-exec provisioner supports both ssh and Winrm-type connections.
There are two main types of provisioners:
Creation-Time Provisioner: Creation-time provisioners are only executed during creation and not during updating or any other lifecycle step. If a creation-time provisioner fails, the resource is marked as tainted.
Destroy-Time Provisioner: Destroy-time provisioners are run before the resource is destroyed.
6.Lifecycle Management:
Controlling the flow of Terraform operations is possible using the lifecycle argument. This is useful in scenarios when you need to protect items from getting changed or destroyed.
A common scenario that requires the use of a lifecycle meta-argument occurs when the Terraform provider itself does not handle a change correctly and so can be safely ignored, rather than the provider attempting to update an object necessarily. With the provider version updates, these “bugs” are slowly ironed out, at which point the lifecycle meta-argument can be removed from the resource.
Terraform supports create_before_destroy, prevent_destroy, ignore_changes and replace_triggered_by lifecycles.
i) create_before_destroy:
When Terraform determines it needs to destroy an object and recreate it, the normal behaviour will create the new object after the existing one is destroyed. Using this attribute will create the new object first and then destroy the old one. This can help reduce downtime. Some objects have restrictions that the use of this setting may cause issues with, preventing objects from existing concurrently. Hence, it is important to understand any resource constraints before using this option.
ii)prevent_destroy:
This lifecycle option prevents Terraform from accidentally removing critical resources. This is useful to avoid downtime when a change would result in the destruction and recreation of resource. This block should be used only when necessary as it will make certain configuration changes impossible.
iii)ignore_changes
This lifecycle option can be useful when attributes of a resource are updated outside of Terraform.
iv)replace_triggered_by
Lastly, this option forces the replacement of the resource when the specified resource is changed. This may be useful when the resource references another resource and needs to be replaced when this happens.
7.Final Code:
After applying all the actions below is the final code:
The output of "terraform apply":
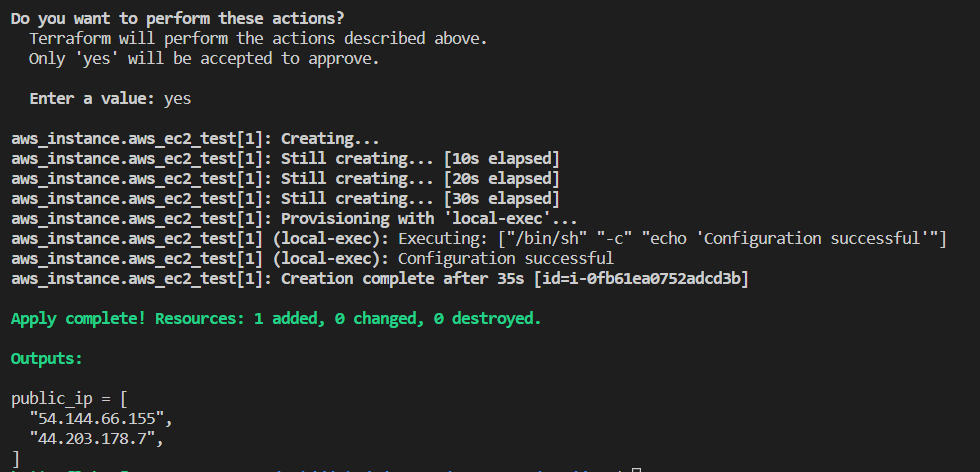
Here we can see that two ec2 instances are created.

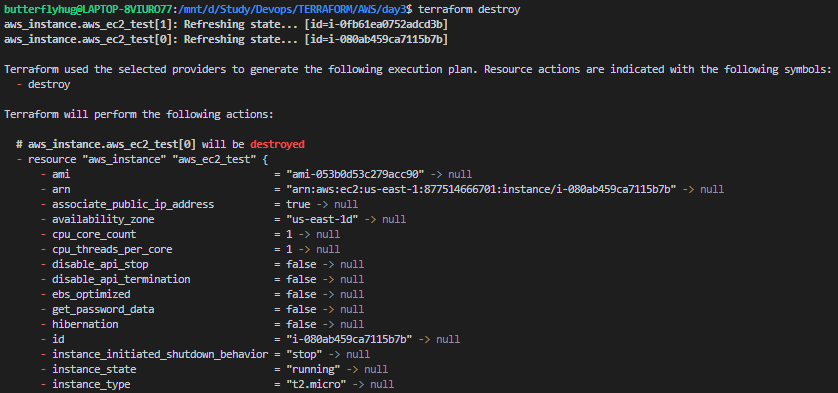
8.Terraform Destroy:
The Terraform destroy command is a command that terminates resources managed by your current Terraform project by deleting infrastructure resources present in the state file. When the destroy command is executed, Terraform first validates the information contained in the state file by cross-checking with cloud provider APIs.
Now let me destroy those instances via Terraform.
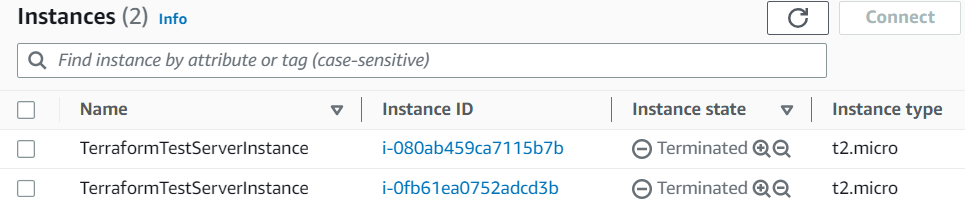
Now we have successfully terminated the created instances.
Github Link:
https://github.com/SudipaDas/TerraWeek.git
If this post was helpful, please follow and click the 💚 button below to show your support.
_ Thank you for reading!
_Sudipa